


There’s a slight chill in the air, the sound of cheering and commentating fills the background from the enthralling football games of the day, the smell of a turkey roasting lingers through the house with freshly baked goods and casseroles ordained across an oversized spread in the kitchen… we’ve finally made it.
By Natalie Garrett, Contributing Writer
Time to pull out our stretchy pants and prepare our appetites so that we can engage our inner feast-mode! I’m a little biased considering how invested I become around the holidays, but I think many of us can agree that Thanksgiving holds a particular buildup of anticipation throughout the year. Besides all of the delicious (and not so nutritious) grub — which is most definitely a highlight of the day — it tends to serve as some wonderful quality time shared over the dining table. While many of us reserve this significant day for family, a trend in recent years has opened up the door to a bonus celebration — and that door leads to friends! Read on to enjoy a few of my tips for a Friendsgiving to remember.
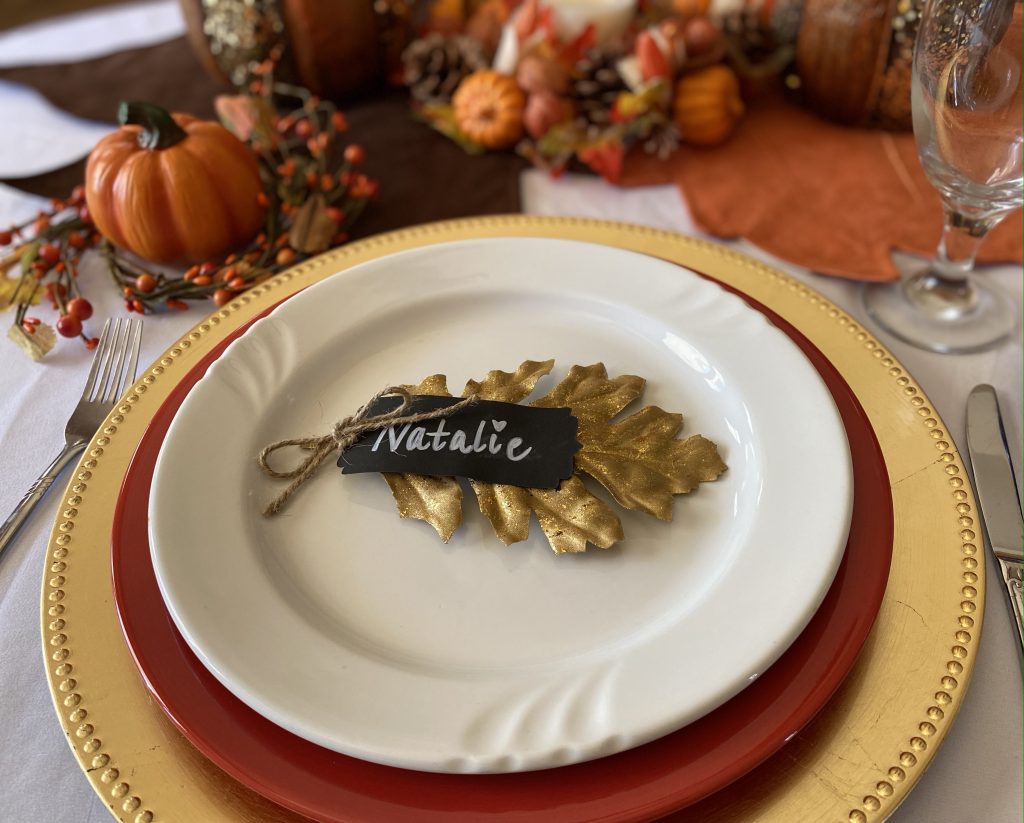
Place Setting Name Cards
Whether how casual or formal you and your crew choose to be, don’t shut down the idea of name cards just yet! Even if you pass on dusting off your finest china, this is a guaranteed way to elevate any table setting. The options are truly endless, so don’t be afraid to get creative and play around with what fits your style. I enjoy adding a pop of sparkle when I can. I found these leaves at Hobby Lobby that were already dusted with a gold shimmer. There were other variations, too, so if you’d prefer a different color from the fall pallet or a less glamorous finish, go for it!
Now, to incorporate the name. I decided to go with black chalkboard paper that I could write on with a white chalk marker. I found some smaller pre-cut pieces (also at Hobby Lobby) that already had some embellishments carved out. Then I cut them down a little bit more to avoid covering up too much of the leaf. Again, depending on your vision, brown craft paper or white cardstock could be suitable alternatives if the black doesn’t match well or offers too much of a contrast. You could also experiment with cutting out different outlines, perhaps just a plain rectangle or even a teardrop shape.
Once I nailed down the tag itself, I filled in my name and poked a hole on the far left end using the tip of my scissors (a hole puncher would work too, of course, if you need a larger opening). I lean toward twine for many of my crafts since it’s such a universal binder that never lets me down, but ribbon or yarn would do the trick, too! I pulled the twine through the hole and looped it around the stem of the leaf, tying a bow to finish it off. If you find that the tag is not lying flat enough against the leaf, feel free to anchor it down with some tape or glue. That should help hold it in place and won’t be noticeable as long as it’s sealed on the back of the tag. Voila!
PRO TIP: Looking for ways to transform those leftovers into a different meal? One of my favorite hacks involves leftover dressing (or “stuffing” if you’re not from the South… I’ll try to forgive you for that). Just cut strips of uncooked bacon in half, add about a tablespoon of dressing to one end, roll the bacon (keeping the dressing contents in the inside) and then stick a toothpick all the way through to keep it from unrolling. Arrange on a sheet pan and bake at 400 degrees until the bacon begins to crisp, about 20 minutes. A bite-sized explosion that won’t disappoint!
![]()
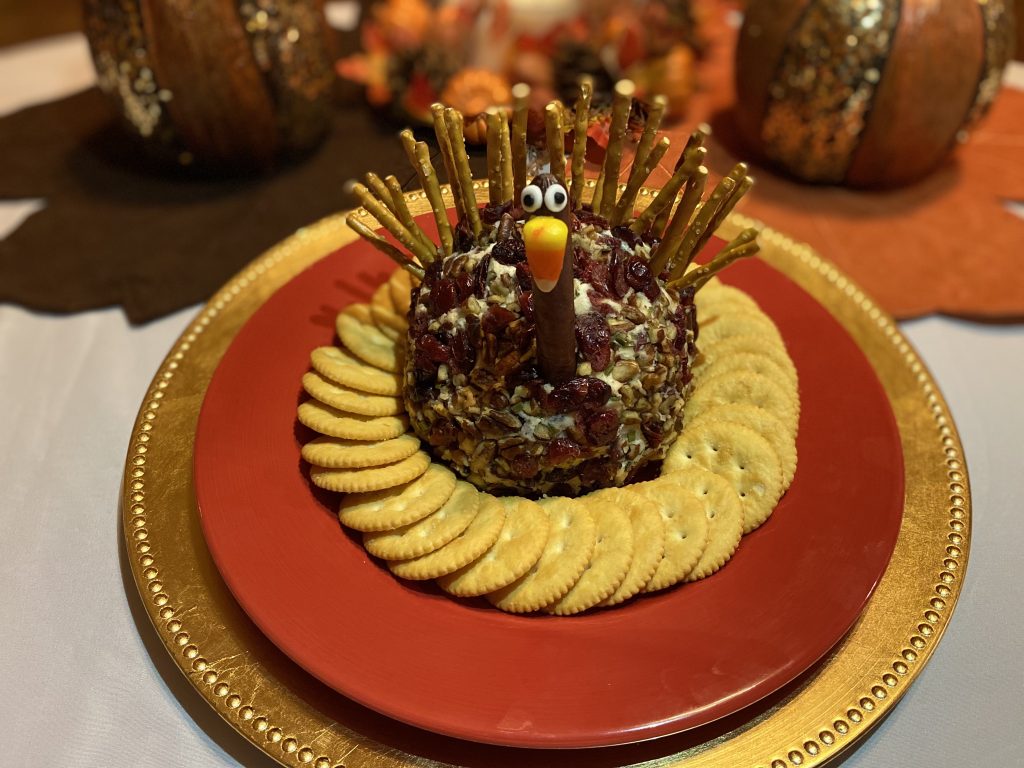
You Little Turkey Cheeseball
Following their sniffers into the kitchen, we all know guests are eager to get their chompers warmed up while waiting for the main course. This is where a cheese ball appetizer becomes a crowd pleaser for parties or gatherings. However, since Friendsgiving is a special and annual occasion, take it a step further by turning your standard cheese ball into a TURKEY. Not only a light, delectable snack, your first course of the evening has now turned into an impressive and oh so festive star of the table. Just don’t forget to leave him a seat!
Ingredients
Cranberry Pecan Cheese Ball:
• 8 ounces cream cheese, softened to room temperature
• 1 cup white sharp cheddar cheese, shredded
• 1 cup dried cranberries, chopped and divided in half
• 1 cup pecans, chopped and divided in half
• 1⁄4 cup chives, chopped and divided in half
• 1⁄2 teaspoon garlic powder
• Ritz crackers for dipping
Turkey:
• Feathers: pretzel sticks
• Eyes: candied eyes
• Nose: candy corn
• Neck: Slim Jim
Directions
In a large bowl, beat together cream cheese, cheddar cheese, 1⁄2 cup of pecans, 1⁄2 cup of cranberries, 2 tablespoons of chives, and garlic powder. Place mixture in the center of a large piece of plastic wrap or parchment paper. Cover completely with the wrap or paper while forming it into a ball shape. Refrigerate until ready to serve. Just before serving, combine the remaining 1⁄2 cup of pecans, 1⁄2 cup of cranberries, and 2 tablespoons of chives on a flat surface or cutting board. Unwrap the cheese ball and roll into the cranberry-pecan mixture until completely covered. Transfer to serving plate. Add the pretzel sticks, Slim Jim, candied eyes, and candy corn to bring your turkey to life. Spread crackers around the turkey for dipping and ENJOY!
Thankfulness Activity
Taking turns around the room stating what you’re thankful for is a tradition as old as time. But, since Friendsgiving is a twist on your typical turkey day, I suggest putting a spin on that activity, too. You might not have paid much attention to the small orange pumpkin positioned to the left of the plate in my example photo… That cute little accessory not only exists as a decorative accent piece, but doubles as a thankfulness activity to introduce to your friends! This particular pumpkin was plastic and also came from Hobby Lobby (seriously, what doesn’t that place have?), but you could even go with real pumpkins from your local patch or grocery store.
You’ll want one for each person, placed next to their designated spot at the table so everyone knows whose pumpkin is whose, along with a black Sharpie. Once the entire party is present, have them stand around the table in front of a seat that is NOT their own. Then, let them use the Sharpie to write on that pumpkin in honor of who it belongs to. For example, I walk up to the table in front of Alicia’s place setting and pumpkin. I’m going to write on her pumpkin one word or phrase that I’m thankful for within our friendship. This word or phrase could be something that you appreciate about that person – their integrity, humor, positivity, dependability, etc. Anything that comes to mind! Everyone will then rotate around the table until they’ve all had a chance to write on everyone else’s pumpkin. I adore this idea since it’s an impactful way to spread gratitude and kindness – plus, the group walks away with a cherished party favor!


